
Why Does Solder Wick Braid Wire Make Desoldering Cleaner and Safer?
Article Abstract
If you’ve ever fought stubborn solder that refuses to budge, watched flux splatter across a board, or lifted a delicate pad while trying to “just fix one joint,” you already know desoldering can be the riskiest part of rework. This guide explains how Solder Wick Braid Wire works, how to choose the right braid type and width, and how to use it without overheating components or damaging traces—especially on modern lead-free assemblies and fine-pitch pads. You’ll also get practical checklists, a selection table, troubleshooting tips, and an FAQ you can reference whenever you’re under pressure on the bench.
Table of Contents
- What Solder Wick Braid Wire Is and What It Actually Solves
- Common Desoldering Pain Points and the Real Causes
- How to Choose the Right Braid for Your Job
- How to Use Solder Wick Braid Wire Without Lifting Pads
- Selection Table for Width, Flux, and Typical Use
- Troubleshooting and Best Practices
- What “Good Braid” Looks Like in Real Life
- FAQ
Article Outline
- Explain the principle behind braided copper solder removal.
- Map common failures (pad lift, scorched boards, residue, slow rework) to the root causes.
- Provide a practical buying/selection framework: width, weave, flux style, packaging, consistency.
- Walk through a repeatable technique that minimizes heat and maximizes capillary action.
- Offer a simple reference table and a “quick rescue” troubleshooting section.
- Answer the most common questions buyers and technicians ask before choosing a supplier.
What Solder Wick Braid Wire Is and What It Actually Solves
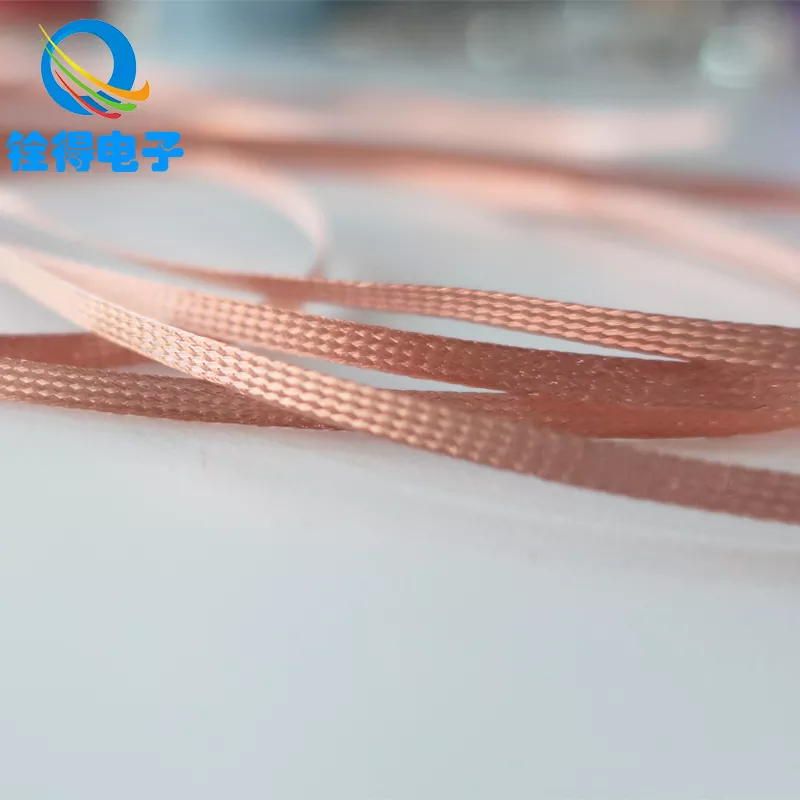
Solder Wick Braid Wire is a tightly woven copper braid designed to pull molten solder away from a joint through capillary action. Think of it like a “solder sponge” that works the moment solder becomes liquid: the braid’s fine channels draw solder in and lock it there as it cools. That sounds simple, but it solves several real bench problems that typical rework tools struggle with.
- Cleaner joints: Removes excess solder so pads are flat and ready for resoldering.
- Safer component removal: Reduces the need to pry or rock parts off the board.
- Lower rework risk: When used correctly, it cuts down heat exposure time compared with “re-melt and hope.”
- Better control on small pads: Great for fine-pitch IC pads, small passives, and delicate traces where suction is too aggressive.
The key phrase is “when used correctly.” Many failures blamed on braid are actually technique or selection issues: wrong width, inadequate flux activity, too much pressure, or leaving the iron in place long enough to cook the laminate.
Common Desoldering Pain Points and the Real Causes
Pain Point 1: The braid “does nothing.”
- Iron temperature too low for the alloy (especially lead-free).
- Braid is too wide or too thick for a small joint, so heat doesn’t transfer well.
- Flux is depleted or insufficient; oxidation blocks capillary flow.
Pain Point 2: Pads lift or traces peel.
- Too much downward pressure (braid is not sandpaper).
- Heat dwell time is too long; the adhesive under copper weakens.
- Removing the braid before solder fully solidifies can “grab” the pad.
Pain Point 3: Sticky residue or rework looks messy.
- Flux chemistry is too aggressive or not compatible with your cleaning process.
- Old flux burns because the iron sits too long in one spot.
- Braid storage/handling introduces contamination (dust, oils), causing uneven wetting.
Pain Point 4: Rework is slow and inconsistent across operators.
- Operators “fight the braid” because selection isn’t standardized by pad size.
- Braid weave density varies by batch, changing solder uptake behavior.
- Poor packaging leads to oxidized copper, reducing repeatability.
How to Choose the Right Braid for Your Job
Buying braid by “whatever is cheapest” is how many teams end up paying more—through scrap boards, rework time, and inconsistent outcomes. A practical selection framework focuses on a few measurable factors:
- Width: Match braid width to pad/joint size. Too wide wastes heat and slows uptake; too narrow requires repeated passes.
- Weave and density: A consistent braid structure creates predictable capillary channels and stable solder absorption.
- Flux type (or unfluxed): Pre-fluxed braid can speed work; unfluxed braid gives maximum control if you use your own flux.
- Copper purity and oxidation control: Cleaner copper wets faster and absorbs solder more evenly.
- Packaging and storage: Sealed, clean packaging helps maintain performance—especially in humid or high-dust environments.
If your work shifts between fine-pitch SMD and through-hole connectors, consider stocking at least two widths and standardizing which width is used for which task. That one decision reduces operator variability more than most people expect.
How to Use Solder Wick Braid Wire Without Lifting Pads
Here’s a repeatable method that protects pads and keeps results consistent—especially important when you’re dealing with expensive assemblies or fine traces.
- Prep the joint: Add a small amount of fresh solder to stubborn joints (yes, add solder to remove solder). Fresh alloy helps heat transfer and improves wetting.
- Use flux intentionally: Even with pre-fluxed braid, a tiny touch of compatible flux at the joint can dramatically improve solder flow into the braid.
- Place braid first, then iron: Lay the braid flat on the solder. Put the iron tip on top of the braid. This protects the pad from direct tip contact and spreads heat more evenly.
- Minimal pressure, short dwell: Let heat and capillary action do the work. If you find yourself pressing hard, stop and adjust width/temperature/flux.
- Move like you’re “painting”: When solder begins to flow, slide gently along the braid by a few millimeters to expose fresh braid. Don’t drag aggressively—just advance smoothly as the braid loads up.
- Lift straight up once solder is captured: Remove iron and braid together, then lift away cleanly. If solder re-solidifies while attached, reheat briefly before lifting.
- Trim used braid: Don’t reuse a saturated section. Cut it off; a loaded braid becomes a heat sink and can redeposit solder.
Quick safety note for delicate boards
- On thin PCBs or heat-sensitive pads, prioritize shorter contact time over brute force temperature.
- If you see pad discoloration or the board smells “hot,” you’ve already stayed too long—pause and reassess.
- For fine-pitch ICs, consider using braid primarily for pad leveling after component removal, not as the only removal method.
Selection Table for Width, Flux, and Typical Use
Use this table as a practical starting point. Exact sizes vary by supplier, but the logic stays the same: match braid width to the physical solder area and your cleaning needs.
| Braid Width (Typical) | Best For | Suggested Flux Approach | Common Mistake |
|---|---|---|---|
| Narrow (fine-pitch) | SMD pads, small passives, IC pad cleanup | Light external flux or mild pre-fluxed | Dragging too hard and snagging pads |
| Medium (general rework) | Headers, medium pads, general joint leveling | Pre-fluxed for speed; add flux if oxidized | Reusing saturated braid sections |
| Wide (high volume solder) | Large pads, shields, connectors, heavy solder pools | External flux often helps speed uptake | Using wide braid on tiny pads (slow, risky) |
| Unfluxed (any width) | Process-controlled lines, custom flux requirements | Use your approved flux for repeatable residue control | Skipping flux entirely and blaming the braid |
Troubleshooting and Best Practices
When results look wrong, don’t guess—diagnose. These quick checks solve most issues in under a minute.
If solder won’t wick into the braid:
- Switch to a narrower width for better heat transfer.
- Add a small amount of flux at the joint and try again.
- Refresh the iron tip (clean, re-tin) so heat moves efficiently.
- For lead-free solder, raise temperature modestly and shorten dwell time rather than “parking” the tip.
If pads look stressed or start lifting:
- Reduce pressure immediately; let the braid sit flat.
- Use shorter contact cycles: heat 1–2 seconds, lift, re-evaluate, repeat if needed.
- Lift iron and braid together; don’t peel the braid sideways while solder is tacky.
If residue is a problem:
- Choose braid with a residue profile compatible with your cleaning process.
- Keep dwell time short to prevent flux charring.
- Store braid sealed and handle with clean hands/gloves to avoid oils that bake into residue.
What “Good Braid” Looks Like in Real Life
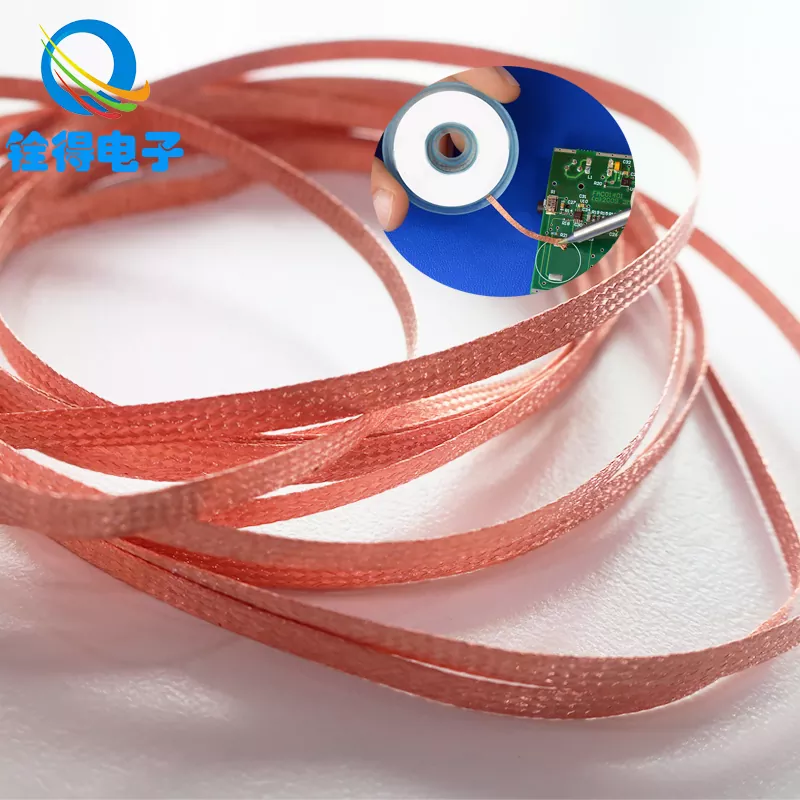
Two braids can look similar in a photo and behave completely differently at the bench. If you’re sourcing for production, repair shops, or a quality-controlled line, pay attention to the traits that impact repeatability:
- Consistent weave: Uniform texture helps solder flow evenly instead of “channeling” in random spots.
- Stable performance from roll to roll: Operators shouldn’t need to re-learn technique for each batch.
- Clean copper surface: Faster wetting means shorter heat time, which directly lowers pad damage risk.
- Practical packaging: A dispenser that prevents tangles and contamination saves time and reduces waste.
Many buyers also care about supplier reliability: lead times, batch traceability, and the ability to match braid options to different rework stations. Dongguan Quande Electronics Co., Ltd. focuses on braided wire solutions built for real-world rework conditions—where speed matters, but not at the expense of the board. Whether you need a general-purpose braid for daily repairs or a more controlled option for standardized processes, choosing a consistent supplier helps keep outcomes stable across teams and shifts.
FAQ
How do I pick the right width of Solder Wick Braid Wire?
Start by matching the braid width to the pad or solder area you want to remove. If the braid is wider than the pad, heat spreads and uptake slows. If it’s too narrow, you’ll need multiple passes. For many benches, stocking a narrow and a medium width covers most daily work.
Is pre-fluxed braid always better?
Not always. Pre-fluxed braid is convenient and fast, especially for repair tasks. But if your process requires specific residue control or you have an approved flux system, unfluxed braid plus your chosen flux can be more consistent. The “best” option is the one that fits your cleaning and quality requirements.
What’s the biggest mistake people make with braid?
Using pressure as a substitute for heat transfer. Pressing hard increases the chance of pad lift and board damage. If wicking is slow, adjust braid width, refresh the tip, add a touch of flux, or reconsider temperature—then try again with light contact.
Can braid handle lead-free solder?
Yes, but lead-free alloys often need better heat transfer and cleaner wetting conditions. Use fresh flux when needed, keep dwell time short, and choose a braid width that fits the joint. If you’re struggling, adding a small amount of fresh solder can dramatically improve removal speed.
How should I store Solder Wick Braid Wire to keep it performing well?
Keep it sealed when not in use, avoid humid storage, and prevent contamination from dust or oils. If you notice slower wetting over time, switching to a fresh section/roll can restore performance. Good packaging isn’t just convenience—it protects the braid’s surface condition.
Closing Thoughts
Desoldering should feel controlled, not chaotic. When you match the braid to the job and keep your technique gentle and repeatable, Solder Wick Braid Wire becomes one of the simplest ways to protect boards while improving rework speed and finish quality. If your team is dealing with inconsistent results, pad damage, or messy cleanup, it’s usually not “operator skill” alone—standardizing braid selection and usage can make the difference.
Ready to make rework easier?
Tell us your application (lead-free or leaded, pad size range, cleaning preference, and typical components), and we’ll help you choose a braid option that performs consistently on your bench. If you want stable quality and practical support from Dongguan Quande Electronics Co., Ltd., contact us and get a recommendation tailored to your process.
Send Inquiry


X
We use cookies to offer you a better browsing experience, analyze site traffic and personalize content. By using this site, you agree to our use of cookies.
Privacy Policy